# Purchase Certificates
To begin issuing verifiable certificates using Circular, your account must have available certificate credits. These credits are consumed each time you anchor a new certificate to the selected chain. This guide walks you through selecting a pricing plan or configuring a custom package that suits your volume and storage needs.
{% hint style="warning" %}
**Certificate credits are tied to the account they are purchased for and cannot be transferred between accounts.**
{% endhint %}
## Certificate Consumption Tiers
When a certificate is issued, its data size is measured in kilobytes (KB) and billed in whole KB increments. Any partial kilobyte is rounded up to the next full KB. For example, a certificate that’s 0.5 KB will be billed as 1 KB, and one that’s 1.1 KB will be billed as 2 KB. This tiered model keeps pricing simple, consistent, and transparent, regardless of minor differences in file size.
## **Ste**ps to Purchase Certificates
{% stepper %}
{% step %}
### Select the Account to Refill
There are two ways to purchase credits from your account. \
From the Organisation Dashboard screen, click the Refill Account button for the account you want to credit.
Alternatively, you can go to the specific **Account dashboard** and click the 'Refill Account' button.
{% endstep %}
{% step %}
{% endstep %}
{% step %}
### Select a Certificate Plan
On the Purchasing Credits page, you’ll see a list of preset plans: Starter, Growth, and Scale, along with a Customise option for more specific needs.\
\
Storage Provided refers to how much metadata or anchoring content each certificate can store. Most certificates use 1kb to store hashes and minimal fields, but you can choose more for rich metadata.
Cost per Certificate decreases with higher volumes. Choose the tier that best matches your expected issuance.
{% endstep %}
{% step %}
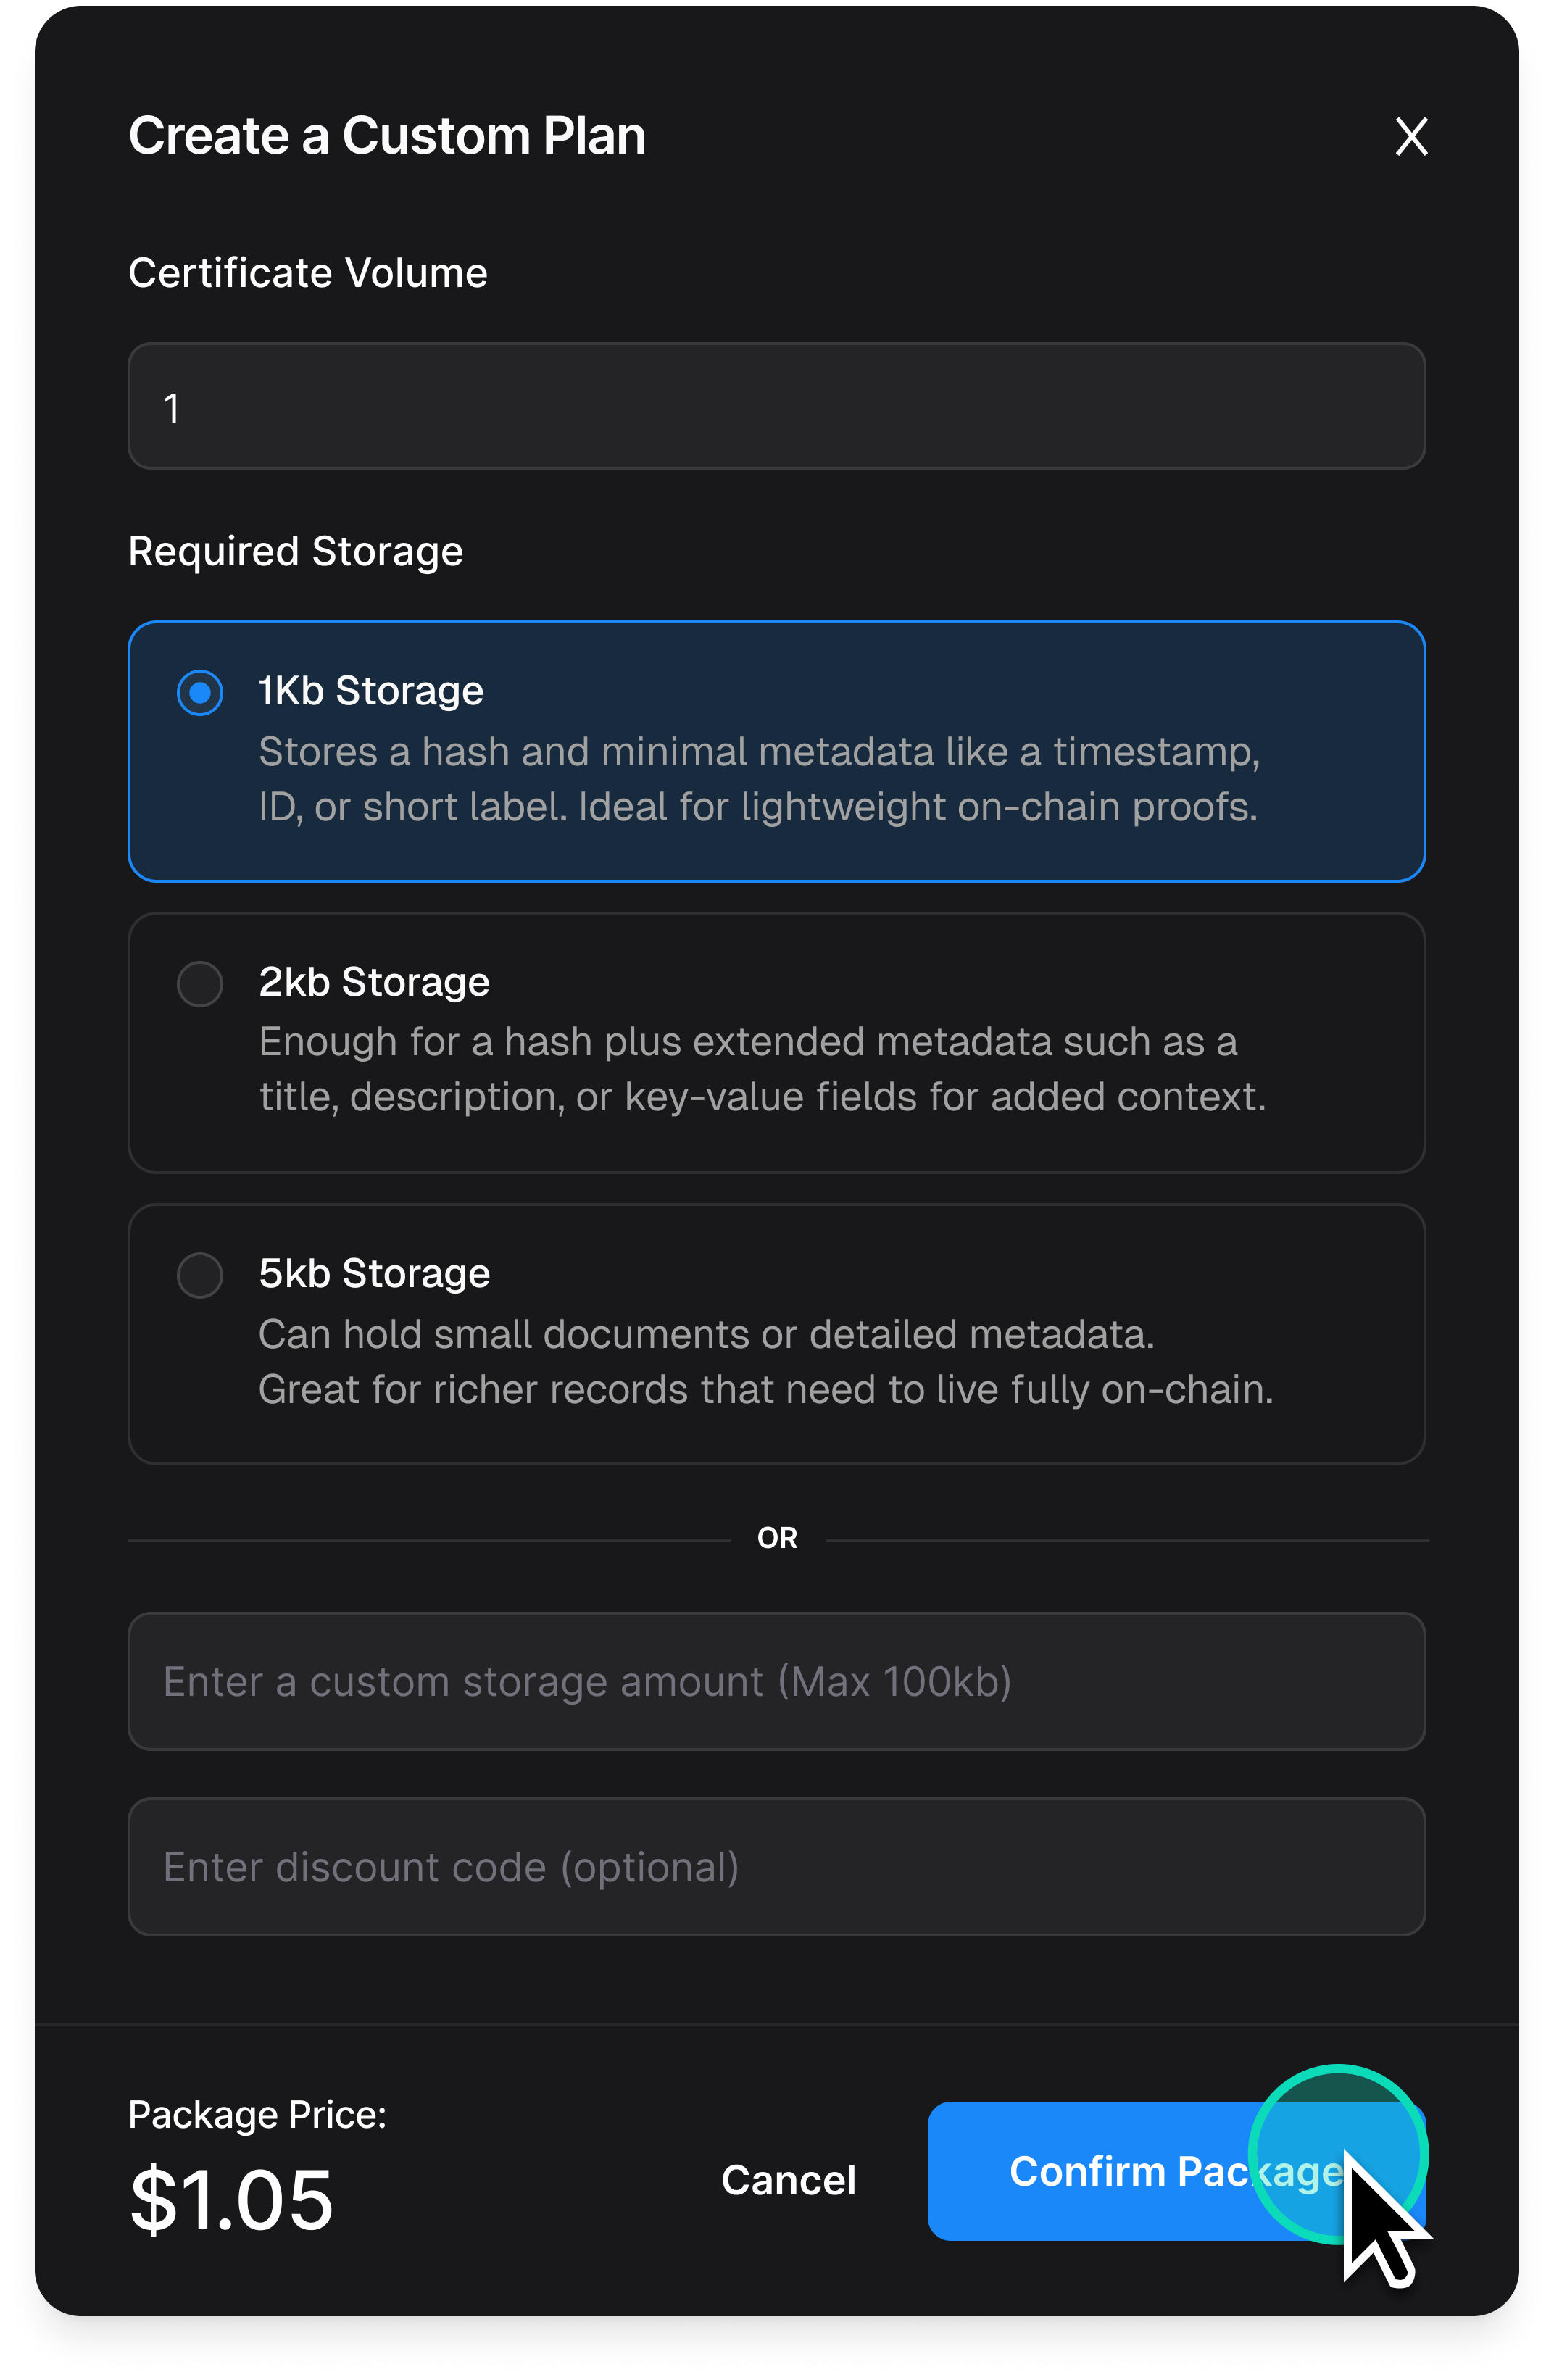
### Or Select a Custom Package (Optional)
If the default plans do not suit your requirements, click Select Plan under Customise to open the Create a Custom Plan modal.
In the custom configuration view:
1. Set Certificate Volume – Choose any value between 1 and 1,000,000.
2. Select Storage – Choose between:
* 1kb: Stores a hash and minimal metadata like a timestamp, ID, or label.
* 2kb: Enough for additional structured fields (e.g., title, description).
* 5kb: Supports small documents or detailed payloads.
* Or, enter a Custom Storage Amount up to 100kb if you have specific requirements.
3. Optionally, enter a discount code if one was provided to you.
4. The Package Price will calculate automatically based on your inputs.
Click Confirm Package to proceed.
{% endstep %}
{% step %}
### Applying a discount code
Discount codes allow you to apply special offers or price reductions to your certificate package before completing the transaction. These codes are typically provided through promotions, partnerships, or campaigns.
**How to Apply a Discount Code**
1. Locate the Discount Code field above the package price.
2. Enter your valid discount code into the input box.
3. Once entered, any applicable discount will automatically adjust the Package Price shown below.
4. Review the updated price before proceeding to purchase.
{% endstep %}
{% step %}
### Checkout via Stripe
Once you’ve selected a preset or custom plan:
1. You’ll be redirected to Stripe Checkout where you can securely pay with a credit card or corporate payment method.
2.
```
```
3. After successful payment, the credits will be made available to the selected account immediately.
{% endstep %}
{% endstepper %}
## What Happens Next?
Once your purchase is complete, you’re ready to begin issuing certificates via the dashboard or the Circular API.
In the next guide, you’ll learn how to use the Explorer to view, search, and inspect your organization’s certificate history.